Formula SAE
- Category: Machining
- Project date: May 2022 - May 2023
- Project URL: Matador Motorsports
Suspension Bellcranks
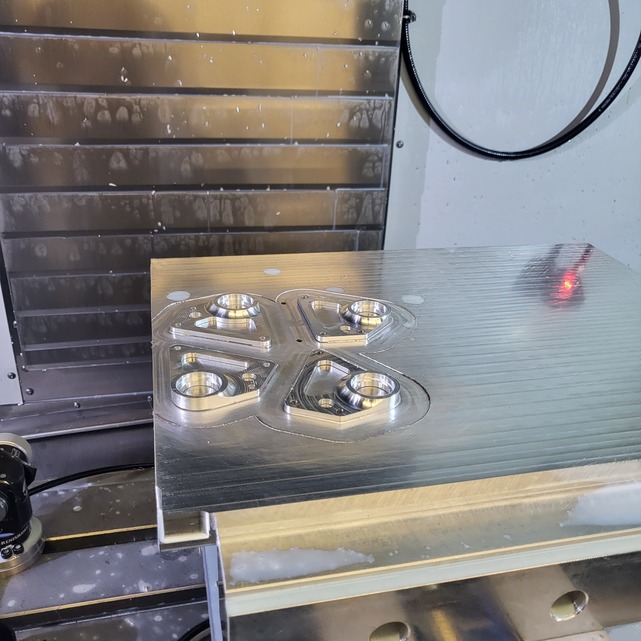
The process of machining the bellcranks involved several steps to ensure precise fitment and achieve the desired size. Initially, I secured the stock in the aluminum jaws and carefully machined the inside of the stock, ensuring it was accurately faced to the target size. However, I encountered a challenge when a ½ inch end mill broke due to stock chatter. To overcome this issue, I implemented machinist jacks to minimize the vibrations in the part, effectively reducing chatter.
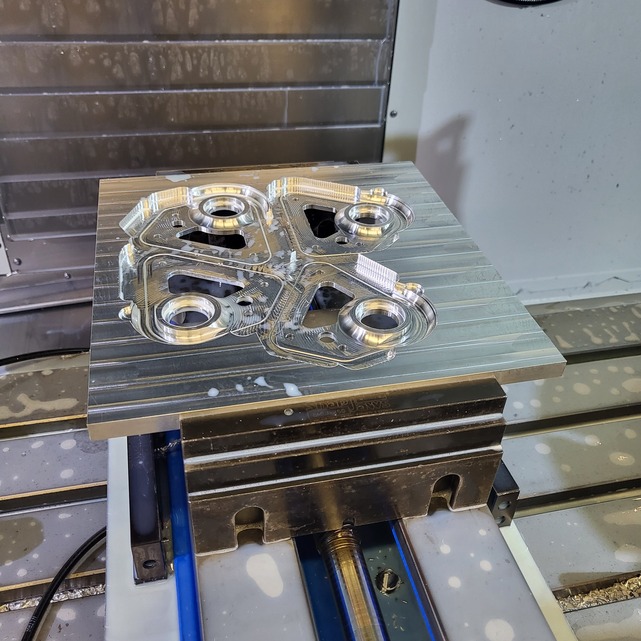
With the chatter under control, I successfully completed the machining of the internal features on all four bellcranks. To secure the bellcranks to the fixture, I drilled and tapped the fixture plate. This provided a reliable and secure attachment point for each bellcrank.
For efficiency, I utilized a vertical bandsaw to swiftly cut out each bellcrank. Following the cutting process, I proceeded to bolt one bellcrank at a time onto the fixture and performed the contour operation to shape the exterior. It is important to exercise caution when working on the bearing lips to avoid any potential damage. I learned from my experience that employing a radius for the lead in and lead out operations is advisable. This technique ensures that the tool smoothly transitions in and out of the bearing lip, minimizing the risk of damage.
By implementing these measures and utilizing proper techniques, the machining process for the bellcranks was completed successfully, resulting in accurately sized and securely fitted components.